Wednesday, June 8, 2011

Blueberry Ruffle Cake

This weekend, I had berries that I needed to use, again.  I know, I know, what a problem to have!  I decided to make a strawberry cake and I'll share that recipe in a later post. 

For today, I thought I'd share how I iced the cake.  I used this method because I just didn't want to worry with getting the icing smooth.  Sometimes, I just can't be bothered with picture perfect icing.  This is a great way to cheat!  And it turned out really cute...


I first applied a crumb coat of icing to the cake.  I wanted to make sure that I didn't have any cake peaking through if my ruffle lines weren't perfect.

I then used my 102 tip to pipe a stripe of icing against the very bottom of the cake.  The line doesn't need to be very flat -- in fact, wiggles and bumps make it even more interesting since we're trying to make it look like a ruffle.  I then worked my way up the side of the cake letting each line slightly overlap the line below it.


Once I made it to the top of the cake, I just kept on making ruffles into the center of the cake.  I left an area on top to fill with blueberries.  I wish that I had left even more room for them because each bite of this cake with a blueberry in it was just wonderful.  I loved it!


This post is linked up at:
      Sugar & Dots What I Whipped Up Wednesday
      We Are That Family Works for Me Wednesday
Jump on over to these pages to find lots of other fun posts!

Sunday, June 5, 2011

Muddled Strawberry Margarita

So what do you do with leftover strawberry puree???


You make a MARGARITA, of course!  I love margaritas and I've read through several awesome recipes for them lately.  They are my favorite thing in the world on a hot summer day!

I was baking a strawberry cake today and had a zested lemon and some strawberry puree staring me in the face when all was said and done.  Normally I'm a lime margarita on the rocks kind of girl but there was something about that bowl of strawberry goodness that was calling my name! 

I pulled out my shaker and put in some ice, about 3 tbsp of the puree, the juice of 1/2 lemon, 1 oz Patron Anejo, 1/2 oz Cointreau, and 1 oz water -- I would have used simple syrup instead of water but I'd already sweetened my strawberry puree so that was all of the sugar I needed.  Feel free to use syrup if you like a sweeter cocktail.  I shook everything up and poured it through the strainer into my margarita glass.  Before pouring, I used the lemon half to rub the edge of the glass and dipped it into sugar.  Now, I did not strain the puree to remove the seeds and pulp.  I was really going for the muddled fruit texture -- feel free to strain if you don't like that! 

This drink will be made again in this house!  Next time with girlfriends in attendance!

This post is linked up over at This Week's Cravings!  Check out the party over there!

Thursday, June 2, 2011

Tiki Tacky Cupcake Toppers

This weekend, a beautiful friend who is expecting her second child was showered with lots of love and gifts.  I had the priviledge of providing the cupcakes for the celebration.  Now, the sweet ladies who planned the shower came up with such a fun theme -- Tiki Tacky!  A luau theme with tons of pink and purple.  I loved the idea, but what to do, what to do... as a cupcake topper?  I kept seeing the bright hibiscus flowers in Hawaiian print shirts in my head but had no idea how to create such a thing.  And I couldn't find anything I liked locally...

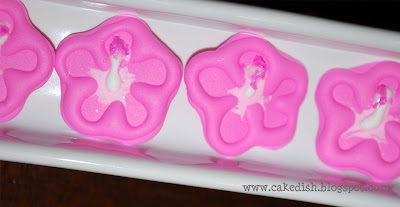
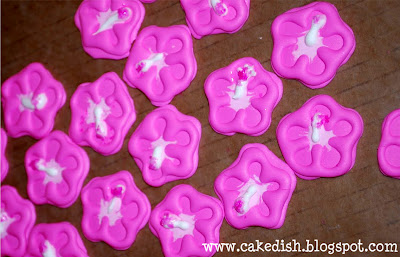
So I made a big batch of royal icing for the first time ever -- using Wilton's recipe and flavoring with raspberry extract.  I kept reading that you could make decorations from it and let them dry on wax paper that could be peeled away before using as a cake topper, so I gave it a whirl...  I could not have been more pleased with how much fun these were to make!


I didn't take any pictures of the process because I wasn't sure they'd turn into anything I'd want to share.  Now I wish I had taken them anyway...  I knew I wanted a 5 petal flower but I didn't have anything around the house that was the right shape.  I meant to look up some clipart to try.  Instead, I noticed that a co-worker had on the most perfectly sized 5 petal flower earring and I asked her if I could trace it.  Although she's still convinced that I'm crazy, she obliged me and here's what I made with them!  I laid the drawing under a sheet of wax paper and piped the outline of the flower.  I then flooded it with the same color icing thinned a bit.  While wet, I added a lighter drop of icing to the center and used a toothpick to pull it up each petal.


I let them dry for about an hour and went back and piped on the raised outline in pink and stamen in white.  I let them dry overnight.  I still wasn't satisfied with those stamens as the icing was a little too thin so they spread out too much.  I picked up a little cake glitter and used corn syrup to paint it on the stamen tips.  Once everything was completely dry, I peeled them off the wax paper and they were ready!

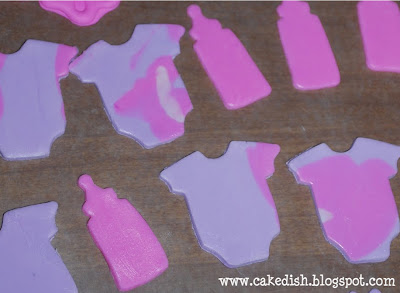
Since it was for a baby shower, I wanted to include something 'babyish' for the cupcakes, too.  So I used a technique I saw from IBakeCakes to make a quilted fabric look from fondant, to make a Hawaiian print I used for onsies and baby bottles.


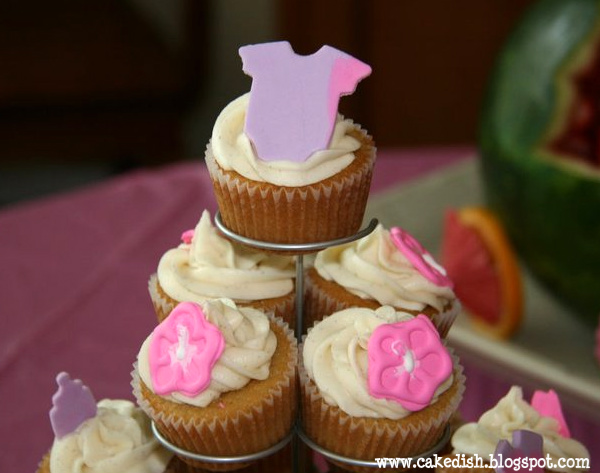
Here's how the cupcakes turned out -- thank you to my friend, Corrin, for taking such a great photo!


I'm linking this post up over at Tidy Mom I'm Lovin' It Friday.  Check it and all of the other wonderful posts over there out and join the party!

Wednesday, June 1, 2011

Emma's Candy Bar Pie

Since we finally had a night without any plans, my 8 year old daughter, Emma, and I decided to head into the kitchen together.  Her second grade teacher made a pie for Pi Day and she has been talking about it ever since.  We made a pie from her memory and our collective imaginations of what might be yummy.  And when you start with ingredients like these, how can you go wrong?


This pie was really simple and such a fun activity to do with my kiddo.  How could I resist that face?


Here are the ingredients you'll need --


We started with the crust first.  Just throw one package of graham crackers that you've broken in half into the food processor.  Pulse until they are completely crumbed and add the butter.  Continue pulsing until the butter is combined well.


Pour the mixture into a pie plate and press into the bottom and up the sides of the dish. 
Bake the crust in a 350 degree oven for about 9 minutes.  Remove from oven and allow to cool while you prepare the filling.


The filling starts with fresh sweetened whipped cream.  Pour heavy whipping cream into the bowl of your mixer and gradually increase the speed to high until the cream is thickened and stiff peaks begin to form.  Add sugar by the spoonfull as the cream is mixing.


Set aside 1/3 of the whipped cream.  Fold chocolate sauce of your choice into the remaining 2/3 whipped cream.


Chop the candy bars -- we only chopped one Hershey Bar and four Reese's Cups.  Then we cut one other Hershey Bar and one pack of peanut butter cups for garnish.


Put half of the chocolate whipped cream into the pie crust and spread to cover the entire bottom of the pie. Sprinkle about 3/4 of the chopped candy bars on top of the filling.


Mix the other 1/4 of chopped candy bars into the remaining filling and spread mixture on top of the chopped candy layer of the pie.  Use the reserved whipped cream and cut candy bars for garnish.  Emma did a great job decorating our pie below.  Refrigerate the pie overnight before enjoying.


_________________________________________________________
Candy Bar Pie
1 package graham crackers, about 9 crackers
4 tbsp butter, room temperature
8 oz heavy whipping cream
3 tbsp sugar
1/2 c chocolate sauce*
2 Hershey's Bars
3 twin packs Reese's Peanut Butter Cups

*I used the same homemade chocolate sauce that used in my Chocolate Covered Strawberry Cupcakes recipe as filling.

Preheat oven to 350 degrees.

Break graham crackers in half and place in food processor.  Pulse until they are completely crumbed.  Then add butter and continue pulsing unil well combined.  Pour mixture into pie plate and press into bottom and up sides of dish.  Bake for 9 minutes.  Remove from oven and cool while preparing filling.

Pour heavy whipping cream into bowl of mixer.  Slowly increase spead of mixer to high and add sugar one spoonful at a time.  Continue whipping until stiff peaks begin to form.  Reserve about 1/3 of whipped cream.  Add chocolate sauce to the remaining whipped cream and fold in.

Chop 1 Hershey Bar and 2 packages of Reese's Cups into small pieces.  Cut the rest of the candy for garnishing.

Spread 1/2 of chocolate whipped cream into bottom of pie crust.  Top with 3/4 of chopped candy bars  Mix remaining chopped candy bars into remaining chocolate whipped cream and spread over the top of the pie.  Use remaining candy bars and reserved whipped cream to garnish the pie.

Refrigerate overnight and enjoy!

I'm linking this post up over at Alli N Son's Sweet Tooth Friday.  Check it out for bunches of sweet recipes!
And I'm linking up this cool new party that I just found -- Delicate Contruction's Made by Little Hands Monday.  I think it's such a cool idea to feature what our littles are making, too!
Related Posts Plugin for WordPress, Blogger...